Showing posts with label Cooking. Show all posts

Sunday, January 31, 2021

Cauliflower Hot Wings!

 Alright alright already, I'm posting the Cauliflower Hot Wings recipe. Jeez you guys. 

Skip to TL;DR version at the END of this post. I'm sorry, I'm not technically savvy enough to know how to do a link that will take you somewhere else in this document. 

OK so I humbly admit, I printed someone else's recipe for these yummy morsels and I cannot find the original link to save my life, so whoever created the original version - you're amazing, I wish I could name you personally. At any rate, its not really plagiarism anyway because I modified the recipe so much that its barely recognizable. That's just how I roll. 

The original recipe was actually for BBQ flavour. I am not a huge fan of BBQ sauce, but I took one look at the photo and said "I can work with this". And there are hundreds, literally hundreds, of versions of BBQ and Hot Wing versions of this baked cauliflower recipe too, mine is just one more on the pile. I did find the timing on this worked out absolutely perfectly to make them nice and crispy, so it is a great starting point to jump off from to get to my version. 

The real joke of the original recipe though is that it was written using only half the ingredients I just listed, and claimed to serve 3-4 people. I'm like... you have got to be kidding. I doubled it and it turned out so good that I ate the entire thing. 

SO, step one - chop up your head of cauliflower into florets. Not huge, not small, just nice and mediumish. Put florets into a large bowl that you can use to toss. Turn on the oven to 425f, and line a large baking tray with parchment. 

Drizzle some oil, your favourite, over all of the florets in the bowl, and toss to coat. Use enough so that they all get a little coated. Original recipe did not specify a quantity, just use your judgement. 

Sprinkle some flour, doesn't really matter what kind (original recipe says you can also use almond meal), over all the florets, tossing intermittently to ensure all get sprinkled. The original recipe called for a half cup of flour for one large head of cauliflower, I find this was a little more than I felt it needed so I quit sprinkling after about 1/4 cup. Use your judgement. More flour might make it crispier. 

After flour coating, sprinkle and toss again with onion powder. Recipe called for 1/2 a teaspoon for one large head, but I feel this is way too little. I'm a flavour fiend, bring on the seasoning. I also decided instead to grind up some crispy fried onions (my #1 all time favourite seasoning) and replace the 1/2 tsp onion powder with more like 1.5 tbsp of ground crispy onion meal. I did not regret this at all, I think it totally made the recipe. 

So now, after the dry coatings, here is where it gets weird. Next thing this recipe calls for is 6 tbsp of milk. MILK! I don't even know what to say about this. I decided to replace the milk with watered down plain yogurt. Again, did not regret. Drizzle the yogurt (or milk, if you wanna) over top of all the florets, tossing intermittently again. The milk is, I imagine, just a wet coat before you do the breadcrumbs, next. 

The original recipe here calls for an optional CUP of breadcrumbs. Well as it happens I am doing a low-carb diet right now, so I said NO to breadcrumbs. I did, however, add a good shake of nutritional yeast, and that was a good idea. My second favourite seasoning after the crispy onions. 

You are now done the first stage of preparation. 

Roll all of that out onto the parchment lined tray, and spread your florets evenly so they are not crowded on the tray. If you have any broken bits, don't throw those out, just mound them up into a pile, they will bake together into a unit. Slide that cat right into your 425 oven, and bake for 25 minutes. 

At this point you want to make your sauces. Original recipe, as I said earlier, called for BBQ sauce, about a cup for a whole head. Not in the mood for that today, so for this recipe, I have to admit, I used up the remains of a jar of hot sauce that I bought at a local restaurant here in town, the Atlas Cafe, they make their own and it is great. However I think this would be just as good using Franks Red Hot, or whatever version of hot sauce you would normally like on your chicken wings. 

I mixed the hot sauce about half and half with plain yogurt, a bit of melted bacon fat (my third favourite seasoning) and added a minced garlic clove. Apparently the fat helps bond the sauce to the cauliflower, so dont skip that, but you can totally use olive or coconut or whatever. So that worked out to I guess about 1/2 cup each of sauce and yogurt, and maybe a tablespoon of bacon fat. I put mine into a squeeze bottle so I could get a nice even coating on the cauliflower, rather than dumping it all in a bowl and having big blobs on some and not enough on others. I still have some left in the bottle for next time! 

At this time I also made a dipping sauce out of, yes, more yogurt. Plain yogurt, about half a cup, mixed with a minced garlic clove, pinch of salt, and about a tablespoon, maybe a bit less, of apple cider vinegar. Amount of vinegar depends on how tangy you want it, but also on how hot your cauliflower sauce is - vinegar helps take away the burn of spicy food! 

So now, when your timer goes off after the first 25 minute cycle in the oven, take out the tray, and put all the cauliflower pieces BACK into your mixing bowl from before (or a new one if you're OCD and already washed that), and squeeze or ladle your hot sauce so that it gives all the florets a nice light coating, tossing intermittently. Put them all back onto the same tray, flip them so the already crispy side is facing up, and put these cats back in the oven again for another 15 minutes. 

The original writer of the recipe made a note that whoever he/she is, he/she likes to broil them for an additional 5 minutes at the end. I did not do this however, and I found they were plenty crispy. 


Now, for all you TL;DR complainers that don't enjoy my prosaic journey of experimentation and just want me to get on with it already, here is the best |I can do for an actual recipe. Although I will say, you're missing out on some good intel doing it this way. Keep in mind, this blog is for a TEST KITCHEN, not a published recipe book. And, as I said several times above though, you need to use your own judgement for several of these steps. 

INGREDIENTS

 - One large head of cauliflower, broken into medium florets

 - Oil or oil spray, enough to coat lightly

 - Approximately 1/2 cup of flour (any type) or if you don't like flour, try almond meal

 - EITHER 1/2 tsp (more) of onion powder, OR if you have access to crispy fried onions, grind some of these up and keep them in your spice cabinet, but for this recipe use about 1-2 tbsp (your taste) 

 - 5-6 tbsp of EITHER milk of choice, or watered down plain yogurt

 - OPTIONAL 1 cup of breadcrumbs (I replaced this with a solid shake of nutritional yeast instead to keep the calorie count down) 

 - 1 cup sauce to coat - either BBQ or hot sauce, or like I did, a mixture of half and half hot sauce and plain yogurt. I recommend adding a bit of garlic to the hot sauce, or ginger to the bbq if you go that route. See, I can't stop narrating!

 - 1-2 tbsp oil or melted butter or bacon fat

 - OPTIONAL Sprinkle with sesame seeds and/or scallions

 - Dipping sauce: 1/2 cup plain yogurt, 1 minced garlic clove, pinch of salt, about 1 tbsp vinegar of choice. You could maybe use lime in this too, and some cilantro, that would be lovely. I'm doing that next time I make this. 

INSTRUCTIONS. 

1. Preheat oven to 425f. 2. Line large baking tray with parchment. 3. Cut cauliflower into florets, and toss in large bowl with oil to coat lightly. 4. Toss florets with flour and onion powder. 5. Toss again with milk or yogurt. 6. Turn contents of bowl out onto baking tray, and spread evenly, do not crowd. 7. Bake first stage 25 minutes. 8. After first stage bake, remove from oven, move florets from tray back to mixing bowl, and squeeze or ladle your coating sauce over your florets. Toss until coated, and place back on tray with crispy side up. 9. Bake again for 15 more minutes. 10. Remove from oven, eat with dipping sauce. 11. Weep with joy at the wonder of your creation. 


Tuesday, May 6, 2014

My love affair with cheese - a bitter end, or everything in moderation?

Saddened by the apparent realization that I may be lactose intolerant.

My recent spate of excessive red meat and cheese consumption left me with some pretty serious heartburn, so I went on a bit of a liver/gall bladder detox to try to re-balance (add: cucumbers, pears and beets; delete: red meat, cheese, refined sugar and chocolate), and within a single day I felt like a new woman.

So of course, to celebrate, I had a seemingly harmless bowl of granola and milk for breakfast. BAM! Heartburn again. Could be the granola, I guess, but what are the chances, really?

This truly does suck. If my life has no cheese in it, I'm not sure how I'll go on. But at least it will help me get better prepared for the post-apocalyptic shortage of luxury goods.

Anyway, I guess for the time being I'll lay low on the milk and cheese, but hopefully it won't mean we have to break up. 

Tuesday, April 29, 2014

Watermelon-strawberry! Holy mother of god, the best smoothie in the world

Post workout refuelling is always a challenge for me, since I go straight there after work, which means I get home close to. 8pm. I've been especially indulgent with the cheesy deep-fried snacks and red meat this last couple of weeks, so my system is telling me its time to detox.

Enter the watermelon strawberry smoothie!!


I bought a watermelon a couple of months back, and couldn't finish it all before it turned to crap, so I chopped it up and froze it. Same with my last pack of strawberries. As a single girl, it's difficult to get through that big a portion unless I have a bender. A watermelon bender.

Anyway, here's the goods:

- half a cup (ish) of frozen watermelon chunks
- half a cup (ish) of frozen strawberries
- 1/3 a cup (ish) of plain low fat yogurt (my preference is Liberte brand, but Greek style is fine too, just not that crappy watery junk)
- 1 cup (ish) of Sunripe watermelon strawberry juice

Blend to a liquid consistency. Consume, and moan in ecstasy. I feel instantly redeemed for the cheeseburger I had for lunch!

You know, smoothies will be the thing I miss most after the zombie apocalypse.

By the way, I DO NOT. Recommend watermelon smoothies, or blended drinks in general, using unfrozen watermelon. It's hard to believe it could be so different.


Saturday, April 26, 2014

Caramel coffee martini

Well what a surprise this little experiment was! The inspiration for this recipe came to me while I was in the liquor store, looking all bewildered and amazed at the enormous array of flavored vodkas! So much to choose from! I stumbled across the salted caramel, and that was it, I just knew.

My friend Brad came over to test recipes with me, and the first one was so good we didn't try anything else all night. Just lots and lots of the same one. The amazing thing is, I have no hangover today!

Anyway...


Fill your martini jigger half full with ice, and in it, place the following:

 - 4 parts Stoli "Salted Caramel" vodka (oh my lord, sooo good)
 - 1 part Kahlua
 - 3 parts half and half

Shake, pour. Makes enough for two large-ish martinis, or three normal size ones. My pitiful little martini glasses are so small that I got four out of it.

I sprinkled on some ground rock salt, and some grated dark chocolate shavings, which were delicious, but I think too messy and way too much work for what they contributed overall. Another idea might be to melt some chocolate and dip the rims in it, and chill the glasses to set it, but holy cow does that ever sound like too much work.


The awesome part of the shavings was that when the martini was finished, the residual shavings looked just like a glass full of ants! Mmmmm!


If you were feeling really decadent, you could top this with some whipped cream, but that's a little too much fat for my liking. I'm trying to reduce the muffin top before my summer vacation. Really, martinis are not the best way to do that.

The next Salted Caramel recipe to test is going to be something with root beer or Dr. Pepper.

Tuesday, April 15, 2014

Fresh lemon dressing

Mkay, so its back to recipes today.

I'm puritanical when it comes to salad dressing, can't stand store bought of any variety, and I've tried almost all of them. On salad that is. They are fine on other things, just not salad.

Anyway, so this dressing simply could not be any easier.

Juice of one lemon
One large garlic clove
1-2 tablespoons - ish of soy sauce or Maggi (to taste)
One tablespoon - ish of honey (again to taste, I like it more savory but its a personal preference that is easily adapted to)

Put all this into a clear container, and add the exact same volume of olive oil or grapeseed oil.

Blend (I use the Magic Bullet).

It is a minor phenomenon, so tasty and healthy and tasty and healthy and... mmmm. Ohhh yeah, it goes nicely in almost every variety of salad too. I had it tonight very simple, just romaine and parmesan.

Wednesday, April 9, 2014

How dare she??

That woman who is using my name
Well, I never.

Much to my surprise, I find that some other so-called "Cheryl" has started up a blogger page called Cheryl's Test Kitchen (that was mine!), where she is posting recipes and commentary. Perhaps rather than posting my own, I will just link to her page and let people think we are the same person. I was planning to change the name of this site anyway, since its becoming less and less about recipes, and more about other things that go down in my kitchen. And other kitchens.

The amazingly positive power of family dinner

Yeh, so I'm admittedly kind of a luddite when it comes to this tech blogging linkback mystery of computer-savviness, I'm working on it slowly but its a major obstacle given how far behind the curve I am.

I'm going to try to re-post a link to one of my favorite sites which covers every nuance of wonderful that I occupy my time thinking about. If you have any recommendations or aid to help me be better at making this page more inviting or graphically impressive, I eagerly await your feedback.

The Art of Manliness - The amazingly positive power of family dinner

This kitchen layout is perfect for dinner parties!
I'm a single woman, and very happily so, but even so I consider my close friends to be part of my protective community circle, and make a point to have group dinners as often as I can. In fact, I have designed the kitchen layouts in my home renovations to specifically accommodate dinner parties! There is nothing in this world that enhances bonding like food. And since this blog originated with a focus on food, this post seemed relevant! As Brett and Kate, its authors, note, even the extremely busy President of the United States makes time for his family dinner his priority (damn communist!), so you can to.

Saturday, March 29, 2014

Artichoke chicken n' shells

My breakfast experiment this morning turned out so good that I thought I'd share!

I pulled out the trusty Magic Bullet (TM) and blended up a marinade of about 1/4 c of mayonnaise,1 clove of garlic, a squeeze of lemon, some rock salt, and about 6 marinated artichoke hearts, with a splash of the liquid from the artichokes for consistency. Pureed this until it was a sauce, and poured it over a large chicken breast that I had cut up. It would totally work fine if you wanted to do it as a whole breast or smaller pieces,  but I went for the peasant style, random-shaped chunks about 1.5" square, as it was getting tossed with bite-size pasta.

After the chicken had a chance to sit in the marinade a bit, like 15 minutes or so, I fished it out of the sauce and cooked it. I opted to pan fry it, but again it would probably work fine if you wanted to broil it or barbeque it even. I might try it barbequed next time, I think it would crisp up nicely.

There was quite a bit of marinade left over in the bowl, so it might be better to do two breasts instead of just one with this quantity.

I fried it in a drizzle of grapeseed oil, a few minutes on each side of the chunks, turning them regularly to get nice browning on all sides. While pan frying the chicken, the oil from the marinade separated, and I dumped a bit out, but not all of it. The rest in the pan became the "sauce" for the pasta!

I like to cook extra pasta and bag up the leftovers for later, I put it single-use portions into the freezer for times like this, when i just wanted a quick snack and not a whole pasta dish. For this dish, I used medium size shells. I put the shells into a bowl with a splash of water, and defrosted it in the microwave for two minutes while the chicken cooked. When ready, just drain off the water, add to the dish in the pan, and toss!

After everything was evenly hot and coated with sauce, it started to brown up a little, and I thought that was a good time to call it done. I served it all up with some sliced fresh avocado, and some finely grated parmesan, with a light spray of coarse ground pepper and salt.

All told, cooking time was under 10 minutes, and it was deeeelish. An unusual breakfast for sure, but hey, I`m an unusual gal! Who wouldn't  like chicken for breakfast anyway?

I should add, the longer you marinate this, the stronger the garlic flavor will be. As it was only 15 minutes, the artichoke was dominant, or I should say subtly managing the situation, rather than being overpowered by the garlic's dramatic flair. If you wanted to snazz it up with stronger flavors, more lemon would be nice.

Also an option, after marinating, roll in panko crumbs, and pan fry for a more crispy fried chicken style.

Saturday, January 29, 2011

oatmeal banana muffins

I must confess, I hopped this idea from another cooking blog, b
http://half-bakedbaker.blogspot.com/2009/01/guilt-and-gulten-free-oatmeal-banana.html

Sunday, December 5, 2010

Smoker fail

My last batch of smoked salmon was terrible. The worst. I never thought the day would come when smoked salmon would be so awful I'd rather throw it away than eat it. It did. One thing I've learned now, is how important it is to give the fish a really good long bath before putting it in the smoker. You cant just rinse off the brine, because the salt is still soaked right in there! And don't leave it in the smoker too long, either. There's nothing worse than really really inedibly dry salty fish.

The smoking process amplifies the saltiness, so its best to be cautious with the time at first. The thickness of the cut does make a difference to how long it should stay in. 1/2" thick means 2-3 hours in the smoker, no more. It should still be oily when it comes out. Also, I'd avoid cherry wood for fish, its too bitter tasting. Apple is great. Oh well, live and learn.

Anyway, my refined approach to smoking fish is a 24-48 hour brining with something that has a good balance of sweet and salty (for example, 50/50 maple syrup and soy sauce), enough to cover the fish completely in the container, with some good quality rock salt rubbed into the flesh before adding the brine mix to it. Quantities of each depend of course on how much fish you're actually preparing. Let the mix stand for 24 hours in a cool area (NOT cold), then bathe (and by bathe I mean soak!) for 2 hours minimum to extract the bulk of the salt. Then you dry the fish off, let it stand a few hours to develop a "pellicle" (a very weird sliminess that is totally important to the curing process) and then smoke for whatever seems sensible given the dryness and saltiness you want.

After smoking, I like to let it dry for a while in a cool (not cold!) area. Hard to do this in an apartment, unfortunately.

I've only ever used an electric smoker. I'd love to try a natural smoke fire to do this, but its an awful lot of work that I'm not ready to invest until the zombie apocalypse requires it.


Pan-fried Oatcakes, a personal favorite!

OK so its winter, and there's a certain need in winter to eat hearty meals, but who's got the time! Well, one of the easiest ways to get that need satisfied is with oatmeal. Now me, I've never been a big fan of porridge-style hot cereal, but being Scottish and all I love oats, so when I stumbled across the oatcake idea in a recipe book, well the idea just hit the spot so to speak.So, this is one of the staples you will find in my fridge almost all the time.

Now, many people are attached to the idea of sweetened oats as a breakfast dish, so when I mention adding cheese to the oats and pan-frying it, I get a lot of groans of contempt and/or disgust from these people. Until they try them! So here's the deal. There are virtually limitless ideas that you can mix in with the oats for variety, I've tried this out so many different ways that I could do a whole cookbook just on oatcakes. However, the best way, in my humble opinion, is the simplest, it turns out kind of like a simple risotto but its so much easier to make. So what I'll do here is give you the instructions to make the oatcakes, and then a few of the better suggestions on how to prepare them. The decision is entirely dependent on your mood, or if you are serving them with anything else.

So you start with your oats. As I mentioned earlier, you want to go for more of a risotto texture, rather than polenta, so its important to use an oat flake that keeps its shape after cooking and doesn't turn to mush. I have tried many different and exotic forms of oats, wild oats, organic oats, quick oats, steel-cut oats, blah blah blah. They invariably produced inferior results to the ordinary porridge oats, particularly in the texture department. Porridge oats are nice and chewy, large flake, and they retain their shape and consistency after being cooked. I usually just fill my small saucepan about 1/3 full with oats, fill it up with water so that all the oats are underwater with about 1" of water covering it (incidentally this is a pretty reliable trick with cooking rice too, you put in just enough water so that if you stick your finger in it the water will come up to the first crease in your finger at the point when you are just touching the oats/rice). As an estimate, I'd say this ratio is about 2 1/2 cups of oats and 3 1/2 cups of water, but that's not very precise, sorry. Next time I'll try measuring and let you know.

Put this on the stove, medium heat, to boil, and add about a half teaspoon of salt (the salt is important!). Once boiling, put on the lid, and turn off the heat. You have to keep an eye on this though, because you really really don't want to burn this. Not only will your recipe be ruined (even if its only a little bit at the bottom, the rest of the batch will take the burnt flavor), but your pot will be ruined too if you scorch the oats. You can scrub and scrub forever, and it will never, ever come off. I don't know why.

Anyway, once the oats have absorbed the water, remove from the heat and add your chosen ingredients.
If the oats are too dry (oat mixture should be sticky and quite moist), just add a bit more water to it, mix it around, and cover up again with the lid to steam it in, and then add the other ingredients.

Once you've added whatever add-ons you want |(see below for some suggestions), you mix the whole thing together to get a fairly even distribution of goods (like chocolate chip cookie dough), and spoon the mix into a baking dish. I usually use my 9" round glass pie-plate because I can cut them into wedges, but anything will do as long as its at least 1 1/2" deep. You want your oatcakes to be no more than 1" thick, 3/4" would be ideal, 1/2" would be too thin to get out of the pie-plate intact. If you have too much mix, you can just keep it in the fridge and heat it up again for breakfast or whatever.

So you have your oat mix in the baking dish, you take a piece of saran wrap and a flat spatula (or your hand, hand pressed is kinda fun), place it over the top, and press the warm mix into the pan evenly, so that it looks kind of like a cake before being baked. With the saran wrap on the top still, stick your baking dish into the fridge to set the oat mix into a loaf-sort of. This saran wrap isn't critical if you're going to pan fry it within a couple of hours, but if you plan to leave it in the fridge overnight, it will become crusty if its exposed to the air for that long.

Once set, cut the oatcake into manageable pieces. I cut my pie into 6 wedges. Heat up a frying pan with some light cooking oil - I'm in the habit of using rice bran oil, it has a good taste and cooks at high-temperature. Coconut oil is also fantastic, it gets a little bit of a movie-theater-popcorn aroma! Now again, you dont want to have the pan set on high, because you dont want to scorch your oats. Med-high is good (7 out of 10), no higher. Lift out your oatcakes from the pie plate, and place them in the hot pan. I can do 3 wedges at a time, but that totally depends on how big you cut the pieces and how big your pan is.

Just cook long enough to brown on both sides, turning occasionally, and then you're done! I do up the whole batch in the pan, and keep the cooked ones in a plastic container so I can just microwave one for like 40 seconds, and get on the road to the skytrain in the morning.  I rarely wake up with enough time to make myself a proper breakfast.

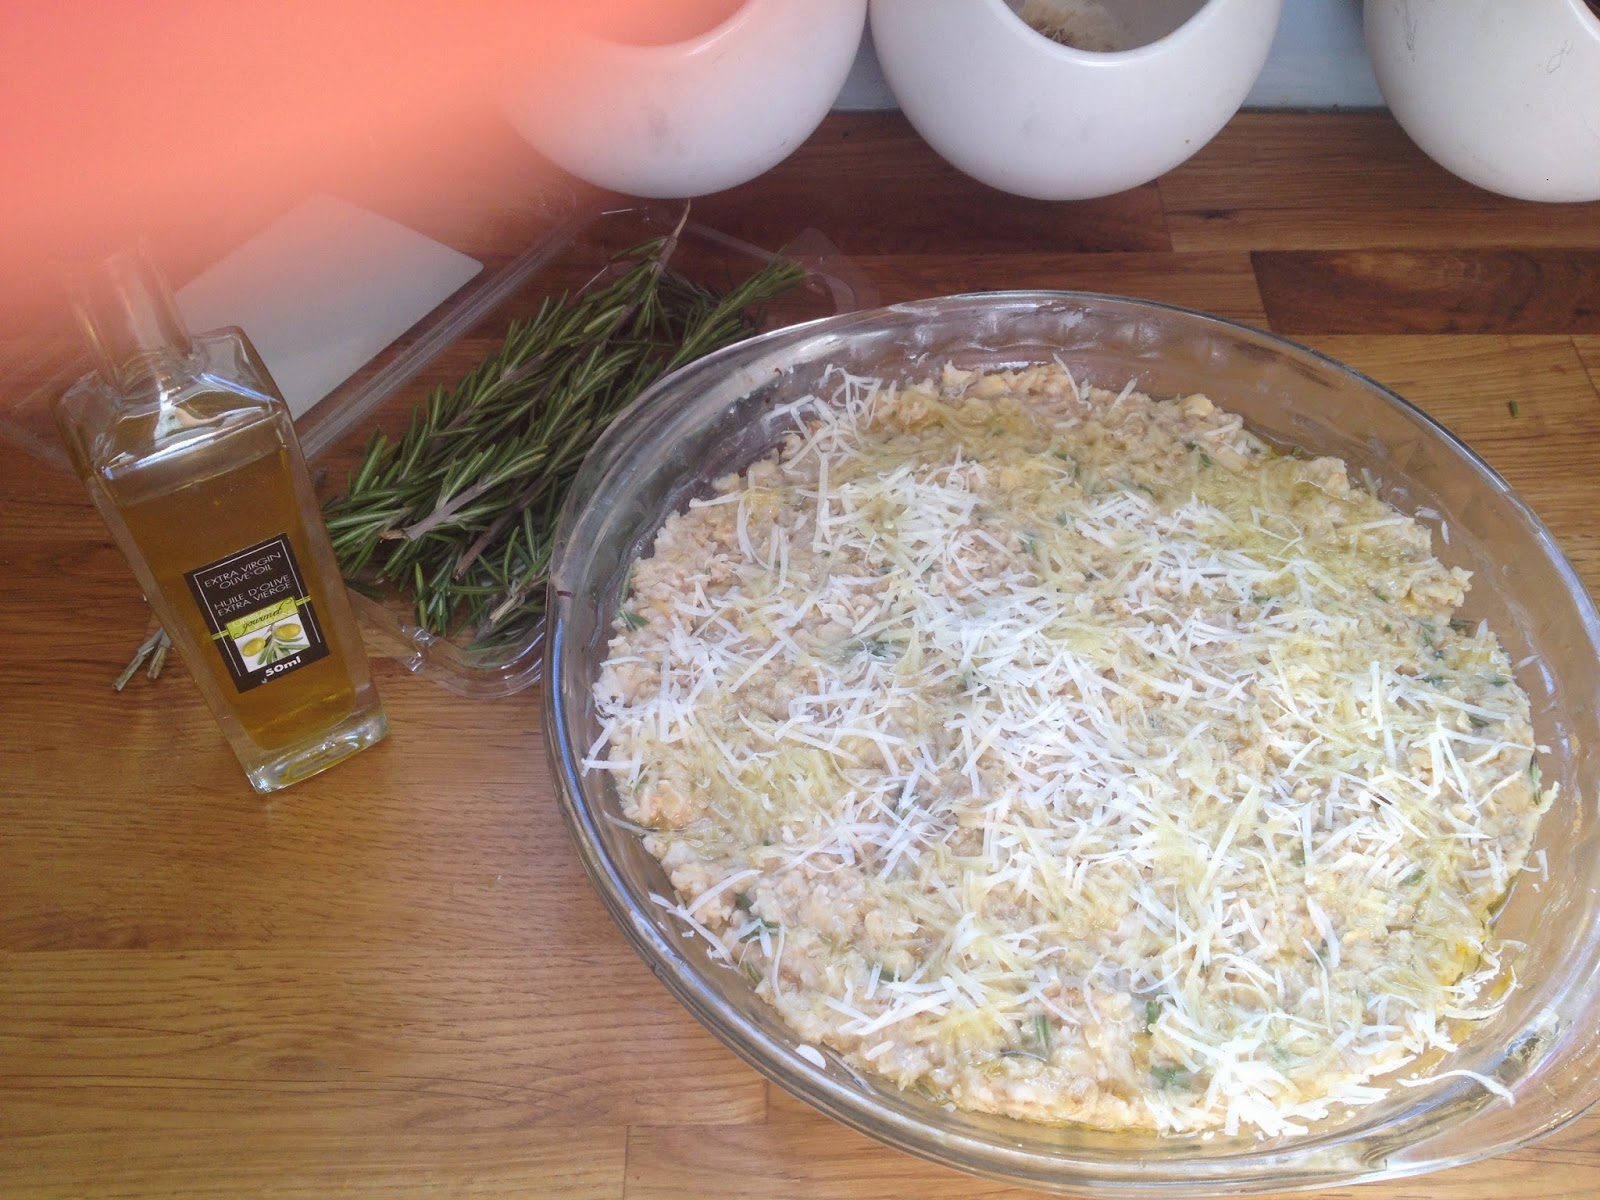
So, the added ingredients? My personal favorite, as long as its for a sit-down meal, is to just make plain oatcakes, with a drizzle of flaxseed oil or olive oil on the top, and a sprinkling of finely grated parmesan cheese, with a finely chopped herb such as basil, thyme or rosemary. Heavenly! I serve this with a side of plain yogurt sometimes, if I want something creamy, but its amazing just on its own.

If I'm really feeling debaucherous, I'll go to my favorite fish shop in Vancouver ("Finest at Sea" on Arbutus Street http://www.finestatsea.com/), and get some smoked teriyaki sablefish to have with the oatcakes - ridiculously, prohibitively expensive (I feel bad if I eat more that one piece at a time!), but this is truly amazing taste/texture combination!!! And plus I just feel so healthy and Scandinavian eating fish for breakfast!

In other versions I've added garlic and chives to the oats; mixed in some chipotle puree and sharp cheddar; mushrooms; red peppers; imitation crab and creamcheese; chorizo; and the list goes on. I've tried them with sour cream, pesto, horseradish, peanut sauce, tomato sauce, and curry sauce. All good. Trust me when I say this, these things are truly delicious, and so versatile.

Saturday, November 27, 2010

Slayer christmas light-up!

Three things I love:
Creative disturbances, Christmas lights, and metal. Does it get any better than this?? I wish I had thought of it myself.

http://www.youtube.com/watch?v=HFjI7gT1FvI

Italian take on Chicken Cordon Bleu

Today's efforts were on chicken stuffing. Grandpa's still in the hospital, so I cooked up a family pack of chicken breasts, stuffed with two different variations on the Cordon Bleu recipe. My mum said she doesn't really like the traditional cordon bleu, so the first batch was stuffed with bacon and swiss. I havent tried this one yet, because I made them up to give to my mum and grandma again, so we will hear the verdict soon enough. The second batch was awesome and I would totally do it again, it was stuffed with proscuitto and fontina cheese, two of my all-time favorites so it was guaranteed to please at least me. It may sound selfish, but I kind of want to keep this batch for myself...

So here's the cooking instructions. The process is a bit time-consuming, so if you're going to bother doing it you might as well make a whole batch of them and keep them in the freezer to cook for quick dinners later on.

The trick to doing this is pounding the chicken breasts thin enough that they will roll up well and cover up the cheese stuffing, otherwise when you put them in the pan the cheese all oozes out the sides and you have none left inside when you go to eat it, which sucks.

So what I did was place the breasts between two sheets of wax paper while I beat them up. Butchers wrap would work even better, but you cant see through it so... there's pros and cons. Anyway, so you start out by butterflying the breast, which in case you arent familiar with the term means you cut the breast open on the flat side, kind of like opening a book. To pound it out, use the flat side of the mallet, rather than the dimpled side (which is for tenderizing), otherwise your breast winds up full of holes and no-one needs a breast full of holes, know what I'm sayin'.

When you've got all your flat slabs of chicken, place 1 1/2 slices of proscuitto on the chicken and lay a couple of slices of fontina cheese on top of the ham. Then you roll it up from the short side into a nice fat little mound. Try to make sure all the stuffing is inside. If its not, its not a big deal, but its just in everyone's best interest not to lose your stuffing.

Once you've got all the breasts stuffed, you want to bread them. I used the two-bowl method, one with a mix of egg and water, and the other a mix of breadcrumbs, herbs, and I added some shake-n-bake just for laughs. Actually that was because I was kind of short on bread. But anyway, you take a rolled up breast and dip it in the egg mix, make sure all exposed parts of the chicken are dipped, and then roll it in the bread crumbs. Place to the side and repeat with all remaining breasts. Then, because I like an extra crispy breading I put them all in for a second wash in the egg and crumb mixes.

To cook, place a couple of teaspoons of light cooking oil in a frying pan, pre-heat the pan to a medium heat, and lightly brown them. When you have them all browned in the pan, place the lot of them on a tray and finish them in the oven on 360 for about 15 minutes. Your kitchen will likely be a complete disaster by this point.

If you want to freeze these and heat up later, make sure to thaw completely before reheating or they will be cold in the middle or get overcooked. You can either heat them up again in the oven for like 7 or 8 minutes, or just microwave them for 1.5 minutes.

A new take on Shepherds Pie

OK so my grandpa went into the hospital for an operation, and while he was in there I figured I'd cook up some pre-made dinners for my mom and grandma so they didn't have to worry about cooking during that stressful time. Here is a recap of my first-ever attempt at Shepherds Pie.

I was never really a fan of it growing up, but my mom loved it, so whats a rebellious kid like me to do other than change the recipe. They seemed to like it, in spite of my unconventional approach.

Cooking instructions:
I started by frying up 1 lb of good extra lean ground beef. When it was almost cooked through, i added 1 small yellow (red would be OK too) onion, cut into small dice about 1/4", and 3 big cloves of garlic minced coarsely. At the end, I mixed in 1 tbsp of chili powder.

While that was cooking, I boiled up about 8 red potatoes, with the skins left on, cut in half to cook a bit faster. When they were soft all through, I mashed them up (after draining the water of course, silly) with about 1/2 a cup of sour cream, a tablespoon of butter, and three triangles of that Laughing Cow cheese that comes in the foil wrap, garlic-herb flavour. I added in about 2 tbsp worth of minced up fresh rosemary and some salt and fresh ground pepper.
When that was finished, i put the beef mix into a baking pan, dumped on top a couple of cans of  mixed vegetables (more on this later), and then spooned the potato mix evenly on top of it all, and put it in the oven to bake. It took about 1/2 an hour to get browned up a bit on the top, with the oven set to 375.

Results:
If I had it to do again I would, change two things - use different vegetables, and add more cheese. I wanted the potatoes to be cheesy, and they were, but not enough. I'd probably go with four triangles next time.
The canned veggies werent bad, but the beans came out overcooked, so next time I might just go with canned carrots or corn, or maybe just use fresh carrots instead.

Anyway, at the end of the day its a good meal to have in the fridge for lunches to take to work.

Saturday, October 30, 2010

Welcome to Cheryl's test kitchen!

Hello everyone, this is something I've wanted to set up for ages, but since I'm essentially illiterate in the ways of modern technology the possibility of blogging has eluded me until now... until Tammy and John sent me the link to their travel blog, and there it was, "click here to set up your blog". It couldn't have been easier.

So anyway, here I will post some of the more repeatable recipes I've discovered by accident out of the very limited ingredients in my fridge. I will also share with you some of the more helpful skills I've picked up, such as smoking fish and plumbing repair, interspersed with running commentary about life as a single girl in Vancouver. I could write a book about that. 

Hopefully some of this will prove interesting, especially if you are in need of some inspiration in the kitchen and are too lazy to shop.